After much deliberation I came up with a look for my backsplash and countertop. If you remember correctly I originally planned to have giant goldfish as my backsplash.
I loved that design, but after I went to Japan I was convinced to go with a less strident look. Now I’m thinking I’m going to do ferns and make the countertop look like a pond. Right now it’s bare plywood so I would spackle and sand it, then paint it and then pour resin all over it. Cricket wisely suggested that before I go all gung-ho on the real thing I should buy a sample piece of plywood and test out all my techniques beforehand. Wise man, that Cricket. I bought a 2′ x 4′ plywood panel and painted it to resemble the pond-y vibe I am going for. Ignore the green dots on the edges – I was trying to make duckweed and failed.
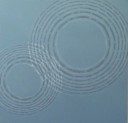
Pond ripples! Cool, huh? I did that by printing out giant concentric circles, laying acetate over the circles and using a soldering iron to cut out those little islands that comprise the dark part of the ripples. I only burned myself twice, which is pretty darn good in my book. Stencils, they are a lifesaver, I tell you. I tap-tap-tapped the dark islands onto the blue background and then free-handed the light parts. And, if you pay attention, you will notice I recycled my backsplash fish. I used them as a guide to make the ghost-fish you see off to the right there. I might make a ghost-bullfrog too, I’m not sure yet.
Last night (because it was warm and the website I bought the resin from said you should pour it when it’s not cold otherwise it won’t cure properly) I followed the directions and slathered the board with a painted coat of resin, followed by a flood coat of resin four hours later. Here, a video to explain my journey. I’ve watched it more times than necessary. I find it hypnotic.
https://www.youtube.com/watch?v=rIGV5qugAqg
The first thing I noticed (other than resin is sticky and gets everywhere) is that the middle tones went really dark. The fish almost disappeared except for the highlights on their fins. Gotta take that into consideration. The resin situation did not go smoothly from the start. I mixed up a batch and poured it onto the board. Due to my stellar mathematical skills it did not cover the correct amount. Not even close. Sooooo I mixed up a second batch exactly the same way. However, for some reason this batch was chock-full of tiny bubbles, making it look opaque. I poured it on the unresin-ed half and you could clearly see the edge where the good pour and the frothy pour met. It looked God-awful. I was sad and disappointed. I covered one corner in corn starch to see what kind of look that would be. Maybe it would give it a cool matte finish (corn starch is known to do that to resin.) Then I forlornly went to bed. I woke up the next morning to tentatively check on my resin-blargh.
Huh. Everything seemed to work itself out. Wow. Look at that. No seam, the bubbles ebbed, it looks pretty cool. I will wash away the corn starch and see what that looks like. Even though it cost me about eighty bucks in supplies I’m delighted that I did a test board because I learned so much. Alright. Next to spackle forty-some-odd square feet of real countertop.
Update 5/18/2014: The corn starch looks not that great. I can’t just pour it on, I would need to get a sifter or something to evenly distribute a fine dusting. So that idea shall be scrapped. Shiny surface it is.


